Why and when is crime scene photography used?
Photography should be used as part of the documentation for all physical crime scenes, including traffic collisions, burglaries, homicides, or any number of crimes against people or property. Photographs, however, can be misleading and confusing to the viewer. Therefore, crime scene photographers must ensure their work is both ethical and honest while capturing as much accurate information and detail as possible. Documenting all elements of a crime scene is a major stepping stone when trying to piece together what happened, how it happened and who did it.
Crime scenes are typically full of activity and often unpredictable, with first responders assisting victims and investigators beginning their work. Even in the most ideal situation, capturing photographic evidence can be challenging. An experienced photographer will know to take photos at all stages of the investigation and that it is better to have too many than not enough images.
The following steps are taken to ensure proper photographic documentation:
1. Secure the scene: In all forensic investigations, the first step is to secure the crime scene.
2. Evaluate conditions: Next, the photographer should evaluate the available light and weather conditions and adjust camera settings appropriately. Crime scenes can be indoors, outside or both; they can be vehicles, include multiple rooms, or any combination of locations, therefore no single camera setting will work for all crime scenes.
3. Shoot the scene: The photographer should take photographs before anything is disturbed, progressively working through the scene from outside to close-up pictures. Many shots should be taken, from the entire scene, to medium shots to show the relationship of evidence to the overall scene.
Just like a television program will show the viewer the outside of a building to establish where the characters are going, the crime scene photographer should capture the whole scene first using wide-angle shots covering the entire scene from the approach and through every area. Close-up images of evidence can be taken out of context, so establishing the scene first with wide and medium shots is critical.
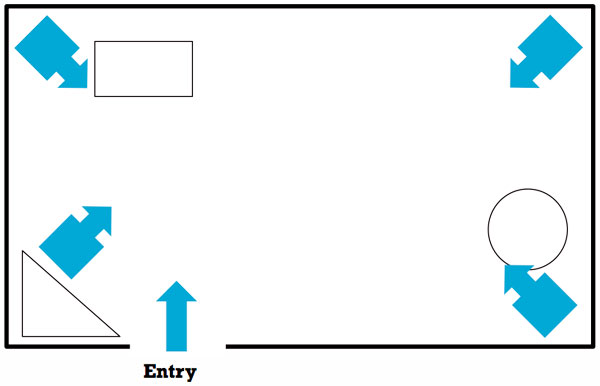
In addition, photographs should be taken looking up from the scene to capture evidence or environmental factors that may be above the scene.
4. Photograph the victims: The next series of shots should include victims (if present) to show locations, injuries and condition.
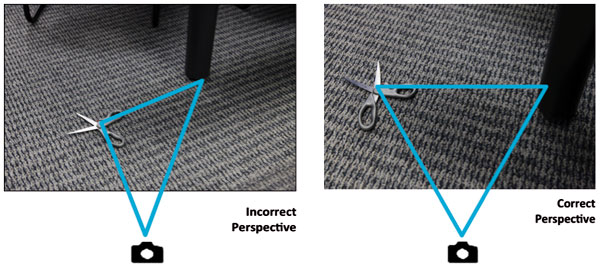
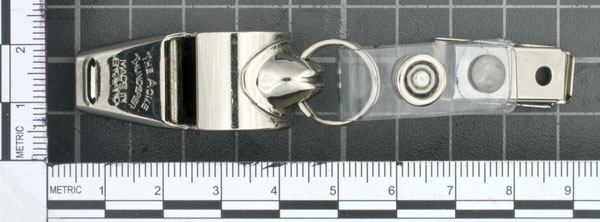
5. Photograph the evidence: Then each piece of evidence should be photographed to illustrate where it was found. This establishes the relationships of the evidence to the victim, the victim to the room and so on. These photographs should be taken from straight above or straight on at right angles, eliminating potential distance distortions. Each piece of evidence should be photographed with a scale to indicate size and without a scale.
(Courtesy of Daniel Nichols)
6. Evidence markers: Photographs should be taken before evidence markers are placed, then again after. These initial shots are important to prove that no one has tampered with the crime scene.
7. Re-shoot for new evidence: If investigators mark new evidence, the whole series of shots should be repeated, including all evidence shots. These photos should include the entire piece of evidence and a scale to indicate size.
(Courtesy of Becky Carter)
Special imaging techniques and lighting should be used to capture things like fingerprints, indentations, shoe and tire track impressions, vehicle identification numbers (VIN) and very small pieces of evidence. Techniques may include:
• Alternate light sources (ALS) - such as lasers, blue or green lights and colored filters that help detect latent processed latent fingerprints or other hidden evidence and illuminate for photographing
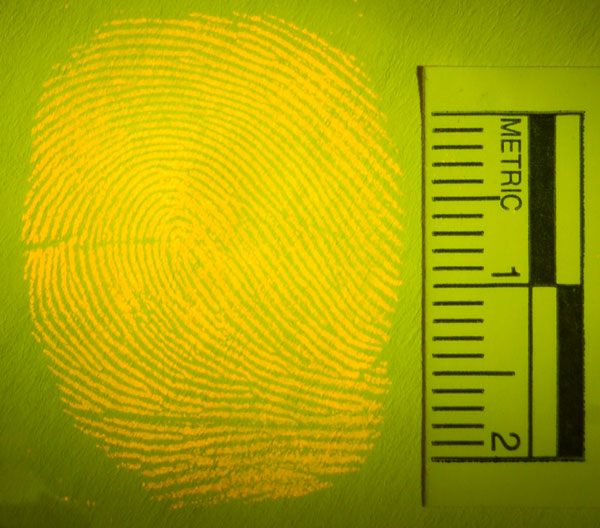
Green light used to illuminate a latent fingerprint. (Courtesy of Scott Campbell)
• Oblique angle lighting - using a flashlight, camera flash or ALS at a very low angle to cast shadows that allow an imprint or impression to be photographed
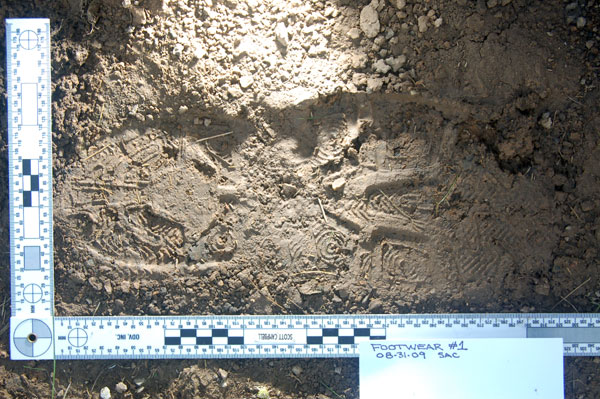
Oblique light used to add contrast to footprint. (Courtesy of Scott Campbell)
• Macro lenses - can take very close-up images (1:1 or 1:2) of small items such as tool marks or trace evidence
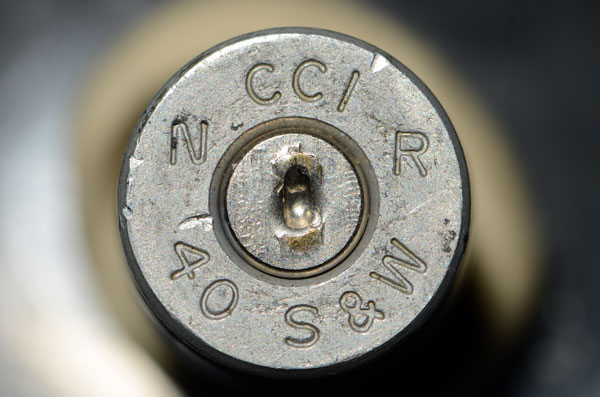
Cartridge case details captured with macro lens. (Courtesy of Scott Campbell)
Photographs should accurately document the lighting conditions at the scene. After those photos are taken, if necessary, a photographer will add artificial light, like a flash, to compensate for a camera’s limitations in capturing the visible range of light under certain conditions.
8. Shoot fast: Sometimes environmental factors such as rain, snow or traffic can make conditions difficult for photography. The photographer must work quickly to capture as much visual documentation as possible from a deteriorating scene.
9. Photograph the victim later: If a victim must be moved or requires treatment, the photographer can go back to document the victim’s injuries. Various techniques using special lighting and colored filters can highlight injuries (bruising, scarring) and healing status.